Home Baking King Fried! The classic of old-fashioned meat floss bread, the mellowness of flourless banana chocolate, and the sweetness of banana pudding, absolutely!
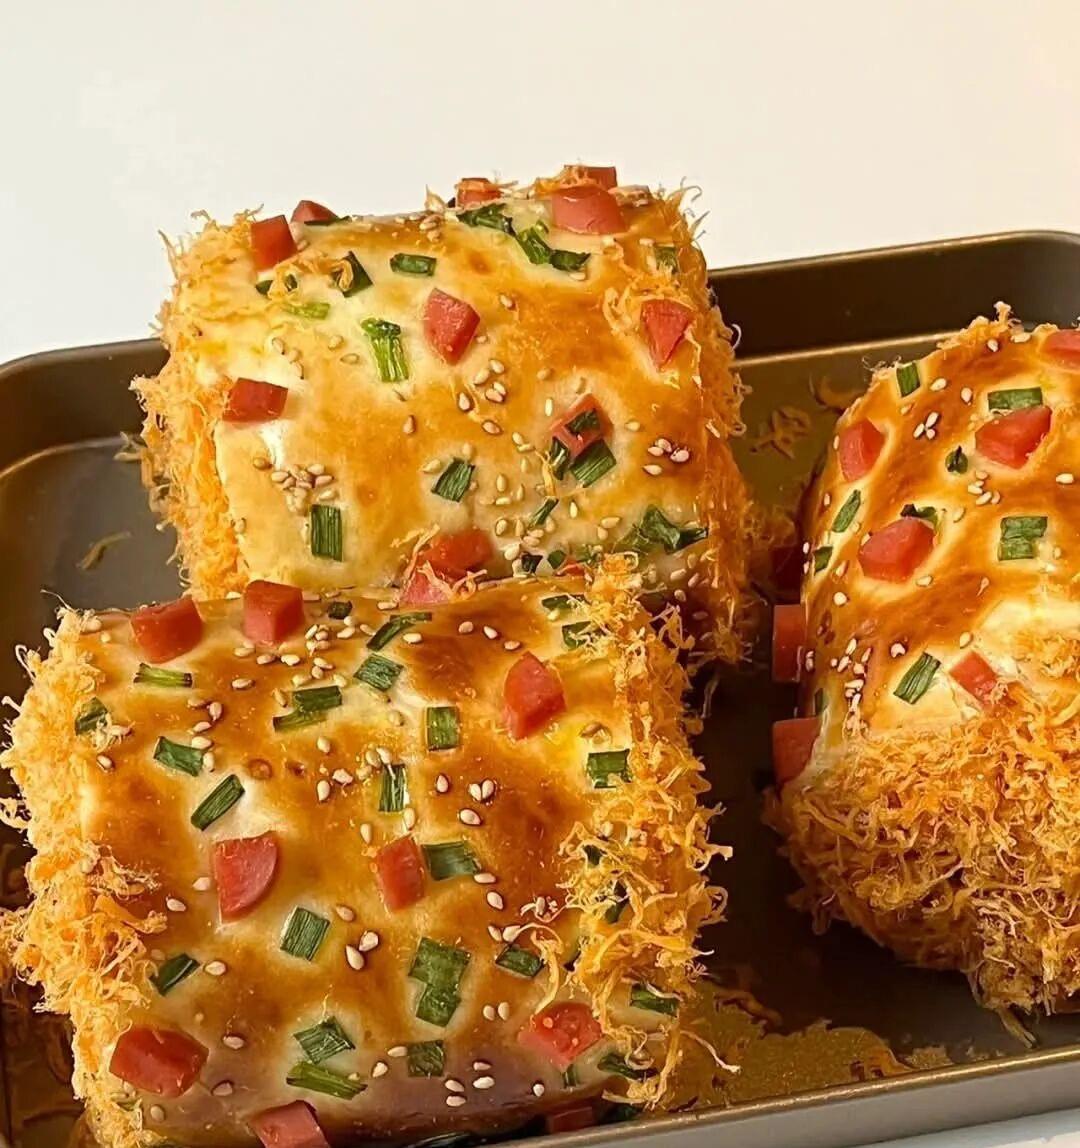
Old-fashioned chives and floss rolls
Material
Scalding (Tangzhong):
Boiling water: 34 g
High gluten flour: 25 g
Main dough:
High gluten flour: 170 g
Low gluten flour: 30 g
Salt: 3.5 g
Sugar: 25 g
Milk powder: 9 g
Fresh yeast: 6 g (3 g of dry yeast can be used instead)
Whole egg liquid: 20 g
Milk: 67.5 g
Water: 57 g
Butter: 17.5 g
Surface decoration:
Whole egg liquid: appropriate amount
Chopped green onion: appropriate amount
White sesame seeds: moderation
Diced ham sausage: Modest amount (optional)
Stuffing:
Salad dressing: moderation
Meat floss: appropriate amount
Preparation method
1. Make scalding seeds
Pour 34 g of boiling water into 25 g of high gluten flour and mix quickly with a spatula to form a paste.
After the scalding seed is slightly cooled, put it in the refrigerator to cool down (about 30 minutes), and set aside.
2. Make the dough
Place all ingredients for the main dough (including refrigerated scalding seeds, but without butter) in a chef's machine or large bowl.
Use the chef machine to stir evenly at low speed, then turn to medium and high speed to knead dough; If you knead the dough by hand, knead vigorously until the dough is initially formed.
Knead until the dough reaches the expansion stage (can pull out a thicker coarse film, but it breaks easily).
Add 17.5 g of butter and continue to knead at medium and low speed (knead evenly by hand and then beat).
Knead to complete stage: The dough can pull out a thin and tough film, which is not easy to break and feels smooth (the dough temperature is controlled at around 28 °C).
Wrestle the dough 2 times to organize into smooth round balls and place in a container with a lid or plastic wrap.
3. First fermentation
Place the dough in a warm environment at 28-30 °C and rise until 2 times in size (about 1 hour, the shiatsu dough does not bounce back).
4. Plastic surgery and relaxation
Remove the fermented dough and pat it to vent to avoid over-pressing and destroying the gluten.
Round the dough with smooth side facing out and cover with plastic wrap to relax for 20 minutes.
Gently pat the loose dough flat, sprinkle a little dry flour to prevent it from sticking, and roll it into a 28 x 28 cm square with a rolling pin (glossy side up).
5. Put in the baking dish and ferment for the second time
Place the rolled dough in a 28 cm square non-stick baking dish (or roll it out on oilcloth/oiled paper first before moving it into the baking dish), making sure it is even in thickness.
Allow to rise at 35-40 °C for 50-60 minutes until the dough is expanded to 2 x in size (elastic when pressed with your fingers).
6. Decorating and baking
Once finished rising, use a fork to poke small holes in the surface of the dough (to prevent excessive bulging while baking).
Brush evenly with a layer of whole egg mixture and sprinkle with white sesame seeds, chopped green onion and diced ham sausage.
Preheat oven to 170 °C, place in the middle layer and bake for about 19 minutes until golden and colored.
Remove the bread and let it dry on the grill until warm.
7. Filling and rolling
Place the bread side down on oil paper, spread a proper amount of salad dressing and sprinkle evenly with meat floss.
With the aid of a rolling pin, roll up into a roll from one side, rolling tightly but without excessive force.
After rolling, leave it at room temperature for 30 minutes to set.
8. Slicing and Finishing
Using a knife, cut the rolls into small, even pieces.
Spread salad dressing on the cut noodles, and then dip in meat floss for decoration.
Tips
Yeast Selection: Fresh yeast can be replaced with dry yeast (the dosage is halved), but it needs to be melted with a small amount of warm water first.
Fermentation environment: Use oven fermentation function, or put a bowl of hot water in a confined space to maintain humidity and temperature.
Preservation method : Endless bread should be sealed and stored at room temperature. Do not refrigerate (it will harden). It is recommended to eat it within 2 days.
Crispy on the outside and fluffy on the inside, this roll is perfect for breakfast or afternoon tea with the perfect blend of meat floss and scallion!

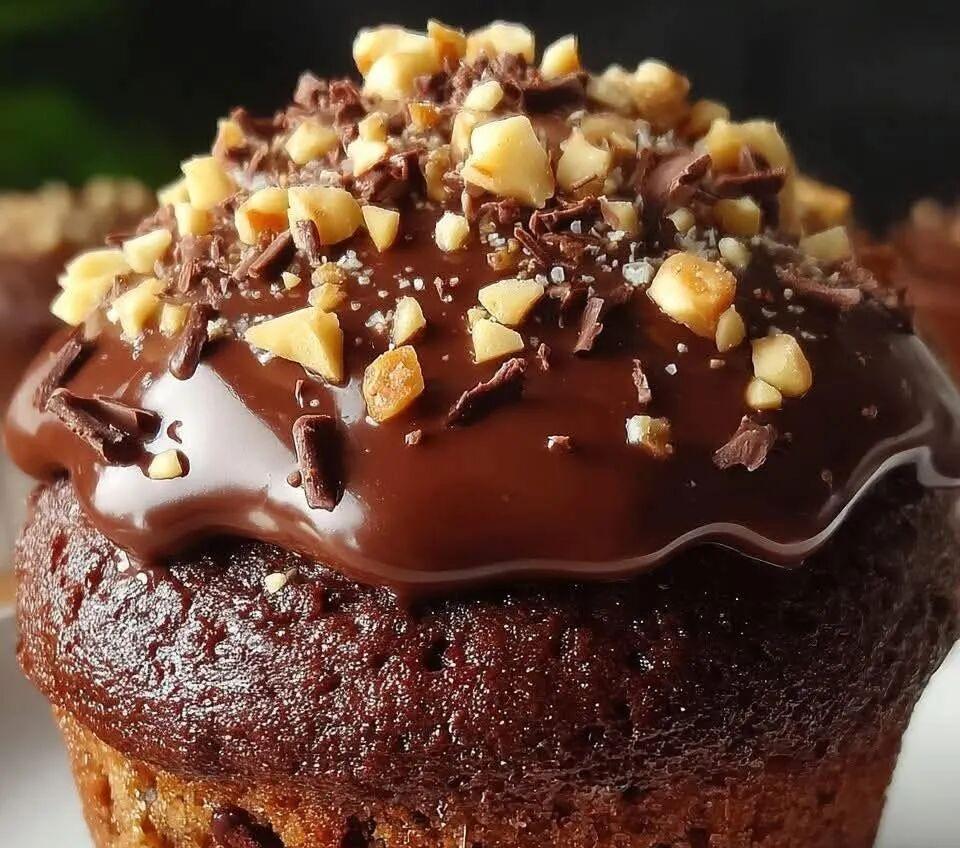
Flourless Banana Chocolate Muffin
Ingredients
-3 ripe bananas
-2 tablespoons cocoa powder
-2 eggs
-1 tsp baking powder
-2 tablespoons honey or sugar
-50 g chopped almonds or walnuts (optional)
-50 g chocolate chips (optional)
-Chocolate cream for decoration (optional)
Preparation method
Step 1: Prepare the mixture
-Puree the bananas in a bowl. Add the cocoa powder, eggs, baking powder and honey. Mix well until smooth.
Step 2: Add excipients
-If desired, add almonds, walnuts or chocolate chips and gently stir.
Step 3: Bake
-Pour the mixture into an oiled muffin tin. Bake at 180 °C for 15-20 minutes until removed by inserting a toothpick.
Step 4: Decorate
-Once cooled, you can spread chocolate cream on top and sprinkle nuts.
Step 5: Serve and enjoy
-Enjoy a delicious banana chocolate muffin.

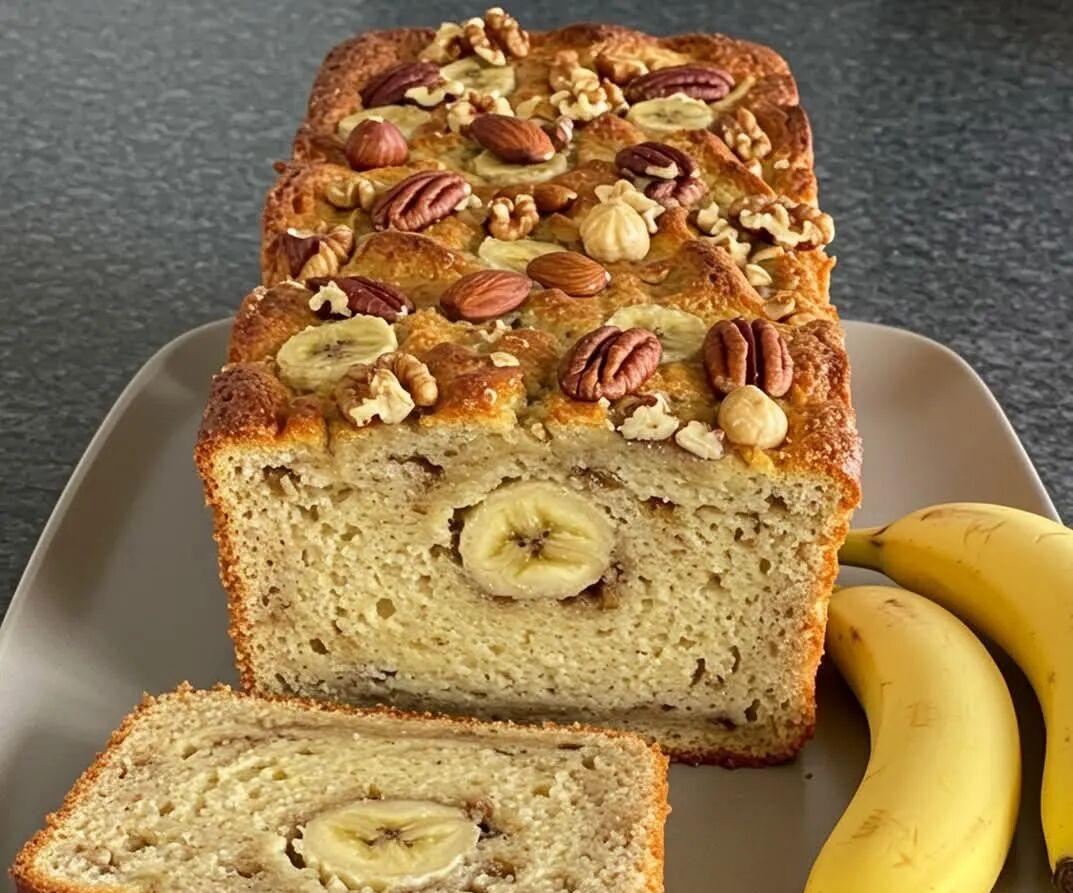
Dried fruit banana pudding ? ? ✨
▪ Ingredients
90 g of margarine (or butter).
2 cups wheat flour
1 tsp baking powder
3/4 cup sugar
2 eggs
4 ripe bananas
1/2 cup milk
1 teaspoon cinnamon powder
1/2 cup chopped walnuts
1/4 cup chopped almonds
1/4 cup chopped hazelnuts
Add a little whole nut for garnish (optional)
▪ Preparation:
Preheat the oven to 180 °C (350 ° F). Grease and flour a pudding tin or cake tin.
Sift the flour with the baking powder in a bowl. Spare.
In a blender, combine the margarine with the sugar until the mixture is fluffy.
Add the eggs one by one, beating well after each addition.
Mash or puree the bananas with a fork. Add it to the previous mixture and stir well.
Add flour, cinnamon powder, and milk and stir until smooth.
Add the chopped nuts to the mixture (you can dip a little flour on the nuts first so they don't sink to the bottom).
Pour the mixture into the molds and garnish the top with some whole nuts (walnuts, almonds, hazelnuts).
Bake for 35 to 40 minutes until picked out with a toothpick.
Cool and unmold, ready to enjoy!


[Warm Tips]
When making Western-style pastries, commonly used cups and tablespoon/teaspoon are standard units of capacity, which are mainly used to measure the volume of ingredients, rather than directly expressing weight. To convert these capacities to grams (g), it needs to be calculated based on the density of the specific ingredient, because the weight of different ingredients varies greatly.
Here are the approximate weights of some common ingredients for reference:
Cup Weight Conversion
1 cup = about 240 milliliters (mL), but the grams depend on the ingredients:
all-purpose flour: 1 cup ≈ 120-130 g (depending on the degree of compaction)
granulated sugar: 1 cup ≈ 200 g
brown sugar: 1 cup ≈ 220 g (lightly pressed)
butter: 1 cup ≈ 227 g
milk: 1 cup ≈ 240 g
water: 1 cup ≈ 240 g
Spoon weight conversion
1 tablespoon (tablespoon, tbsp) = 15 ml
Flour: 1 tablespoon ≈ 8-10 g
White sugar: 1 tablespoon ≈ 12.5 g
Cream: 1 tablespoon ≈ 14 g
Water: 1 tablespoon ≈ 15 g
1 teaspoon (teaspoon, tsp) = 5 ml
Flour: 1 teaspoon ≈ 3-4 g
White sugar: 1 teaspoon ≈ 4 g
Salt: 1 teaspoon ≈ 6 g
vanilla extract: 1 teaspoon ≈ 5 g
Notes
Status of ingredients: For example, whether the flour is sifted and whether the sugar is compacted will affect the weight.
Precise measurement: If the recipe calls for precision, it is recommended to use an electronic scale to weigh directly, rather than relying entirely on cups or spoons.
Regional differences: This refers to the standard cup (240 mL) commonly used in the United States, other regions (such as Australia, 1 cup = 250 mL) may vary slightly.
END